Friday, November 11, 2011

Lest We Forget

Today is Remembrance Day here in Canada; Veterans Day in US. Here's the mani I'm wearing today.


Started with OPI Red by Fortune Cookie and Color Blast by Orly Reflection; two coats each. I used this red polish as I know that black stamping shows up well on it and it is slightly darker in real life more similar to the above pix; sometimes using a darker red polish, the black stamping isn't as visible.


Added full accent nail using SdP-D09 with Black Konad special polish.


Using Red Konad special polish, added three images for the poppies on accent finger; these are individual flowers found on Big SdP E in a variety of sizes; I used the second to smallest. I think its fantastic there's size options on some of these images found on some of the Big and XL plates...you can use the one that suits your nail size best or add a bunch of the same design in a variety of sizes.


Filled in the centres of the flowers on the full size nails using Black Konad special polish.


Lastly, added a coat of SV.


Please remember those who gave their lives and continue to serve so that we enjoy the freedom we have today.

Thanks for looking.

Thursday, November 10, 2011

Essie Hot Coco, Layered and Stamped

This post will be short...just like my nails!


Two coats of Essie Hot Coco.


Yawn. Oh, so not me. So I added one coat of Anna Sui #709.


Now we're talking! Hello holo glitter! I seriously wish my camera could do a better job of picking up what the mani looks in real life (or maybe its user error?!)...the glitter is seriously more interesting than this....*sigh*.

Stamped! Used CND Gold Chrome with fauxnad IP SdP 38.


Thanks for looking!

Wednesday, November 9, 2011

Lise Watier Festive Chic

A couple weeks ago, I was walking through the cosmetic section at Sears and seen the new Lise Watier collection on display. It includes two polishes; Festive Chic caught my eye so I bought a bottle.


This polish is seriously gorgeous...not sure if it translates well in the pictures as the finish looks gritty versus the gorgeous shimmer that's in the polish, but gorgeous this polish is.


I wasn't sure what I wanted to stamp on it; ultimately decided upon China Glaze OMG using SdP 30. Not sure if this was the best choice, but the mani kinda looked funky cool anyway. Unfortunately, this camera lighting option reallllly gives me lobster hands lol! Thank goodness they aren't this red looking in real life!


After I had this polish about a week, I read that it was selling for $14 a bottle versus the regular $12 as the two polishes had a built in light. I never noticed this when I bought it; I checked my bottle when I got home and sure enough, it's there.


I had seen the rounded notch in the bottle when I bought it, but honestly thought it was just a way to better grip it...honestly! There's a little rubber button on the top of the lid you press in to turn it off and on.

My two cents is that I'd rather keep the $2 I paid extra for the light and put it towards my morning Timmies....the light served no purpose for me in fact, the way my polish station is set up, its more of a hindrance...this is why....


My main lighting is in front of my table; when I'm polishing the light casts a shadow on my nail (this is a pix of me faux polishing but you get the drift anyway)...hardly helping me do my nails....plus I don't know many people that polish their nails in the dark and need a light to apply it better anyway! On the plus side, I was impressed by the amount of light such a little light cast...I'll have to keep this in mind if the power goes off when I'm doing my nails....I'll keep my Lise Watier bottle at the ready to guide me to the candles!

Here's Festive Chic beside OPI La Boheme....not dupes by any means....but probably La Boheme is probably the closest polish I have to Festive Chic in my stash.


I bought my bottle at Sears but have since seen them at Shoppers Drug Mart. Retail for $14; built in flashlight included!

Thanks for looking!

Monday, November 7, 2011

China Glaze Rich and Famous

I liked the way the NYX mani turned out so much, I decided to do something along those lines again, only in a different colour!


Started with a base of two coats of China Glaze Rich and Famous.


A coat of OPI Pink Me I'm Good about half way down the nail. I really need to do a full mani with Pink Me I'm Good...its gorgeous!


NYX Gold Sparkle on tips.


Stamped using Konad black special polish using fauxnad IP XL E.


Decided to add a few white dots to give it a colour pop.


I hope everyone had a wonderful weekend...thx for looking!

Friday, November 4, 2011

New (to me anyway!) NYX Bottles

It's hard to believe that I closed my weekend place almost a month ago already...I miss it already! The very last weekend I was there, I went without the family, leaving me with a bit of free time on my hands. I remembered a post from a fellow GTA gal, nailxchange, about possibly finding the elf concealer brush (used by some gals in their polish cleanup) at Giant Tiger. I drove to both the Giant Tiger locations in Peterborough and Lindsay to see if I could track one down. (In hindsight, I'm sure this was not an economical thing to do seeing how I probably spent $25 in gas looking for a $2 cleanup tool....but I did.) Anyway, it was all for naught as I didn't find the brush at either location. But when I was driving through Lindsay, I seen a Rexall on the main drag and thought I'd see if they have anything new. I checked out all the polish displays and came across the new style of bottles in the NYX display. While I had seen these on some etailer sites, it was the first time I seen them in real life.


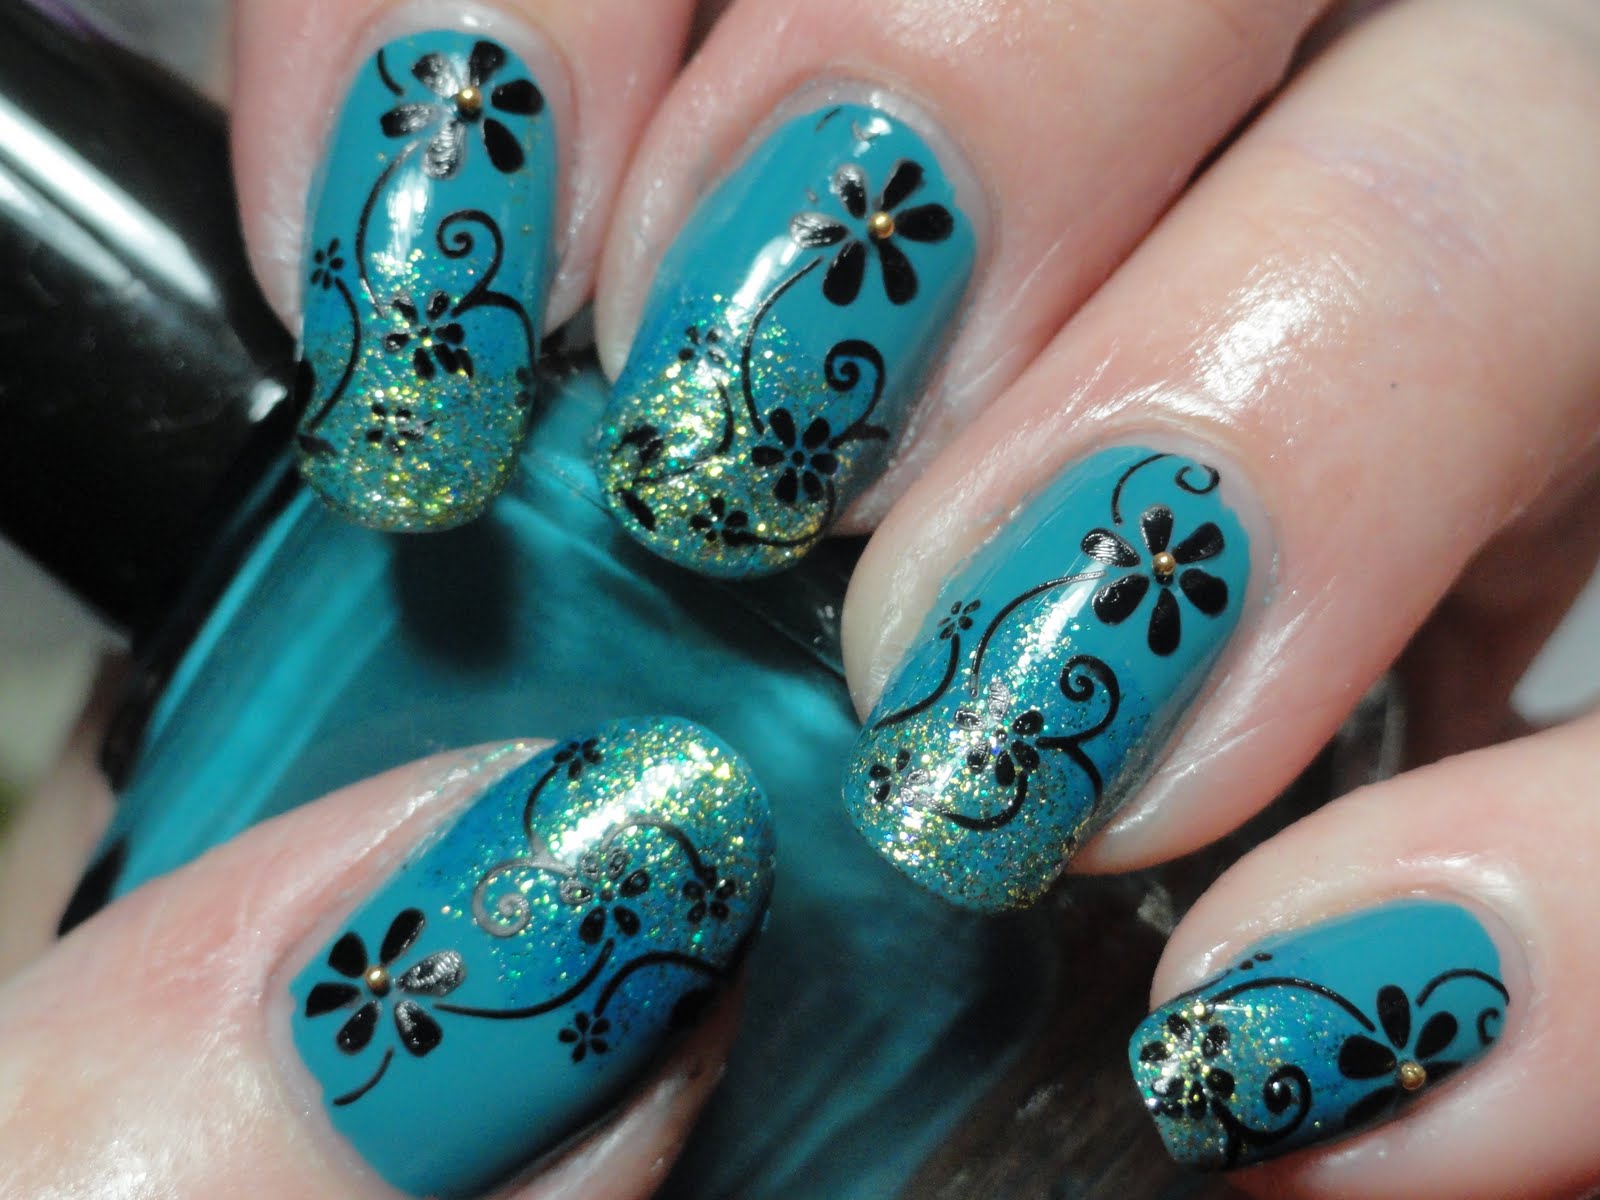
I picked up two colours, NYX Aqua and NYX Be Jeweled; this is the mani I came up with.

Started with one coat of NYX Aqua. Yes, one coat!


Added one coat of NYX Be Jeweled about halfway or so on my nails.


Lastly, added NYX Gold Sparkle on tips. (This is the old style bottle; I've had it for a while.)


Stamped using Black Konad polish using XL plate E.


Lastly, added some of those really tiny balls in the centres of the flowers. I bought a set with a bunch of colours from ebay a while back, super cheap.


This was the first time I've used them and they were a little tricky coaxing onto the nail as they are so tiny...and as small as they are, I found they actually stick out and get caught on clothes and towels even with a topcoat. They stick out and get caught on stuff more than rhinestones, which is pretty annoying.


Topped with coat of SV.


I did this mani on October 21st in between Halloween manis. I'm only pointing this out as you may notice that my last post, my nails aren't this long. I've actually filed them down twice since October 21st as they are just too unmanageable for me at the length posted here. The Day of the Dead mani was after filing them once about a week before then and I cut them down again last night because they seem to be growing awkward...or I filed them funny the last time, not sure! Anyway, they are now even shorter today than as in the Day of the Dead which I did November 1st. So you may see a bunch of mani's with nails at different lengths over the next little while as I post the mani's that haven't been posted yet....so you'll know why! (I'm not even sure if anyone cares about this or even notices as I can't imagine that anyone is checking out my nails that carefully, but just thought I'd explain anyway!)

Have a great weekend!

Wednesday, November 2, 2011

Day of the Dead Mani

I was scheduling appointments in my daytimer yesterday and seen that November 2nd had a notation that it is Day of the Dead. I don't know much about Day of the Dead to be honest....all I really know is that I've seen some really cool tattoos and makeup with this theme! So I do apologize in advance if I've offended anyone if I've done something taboo by doing this mani as its not really a holiday/tradition I'm familiar with! Anyway, I thought, why not try out a Day of the Dead themed mani?...this is what I came up with.


Here's mani in progress. Colours used are OPI Bride's Bouquet (white), Misa Hanging with the Girls (yellow) and WetnWild Black Creme (black). Two coats each.


Stamped using black and white Konad special polishes using Big SdP B (middle finger; full image plate of flowers), D03 (skulls on ring and index fingers), S8 (tombstone on thumb) and H12 (skull on pinkie).


Then just added a series of dots to make flowers and dots.


Polishes used were Konad special polishes in yellow, apple green, black, blue and CND Raspberry Parfait.


Until this morning, I only had one implement to use for dotting...the end of a brush I use for cleanup. I usually make small and large dots just by adjusting the pressure when I'm applying them...well, this mani proved I have no dotting skills (!) when I needed to do more than one or a few so I went out and bought a dotting set so hopefully will have more uniform dots when and if needed! (or it could be just that I was getting tired as I started this around midnight!)


This mani took me about an hour and a half. Looking back, I have no idea why it took so long...I mean, its just a couple of stamps and a few dots!


Lastly, added a coat of SV after about 10 minutes of applying my last dot....wanted to make sure they were all dry so I had no SV drag!


Thanks for looking!

Tuesday, November 1, 2011

Belgrave Place

This is another nails inc. polish I picked up from Sephora a while back.


nails inc. Belgrave Place, stamped with Nicole by OPI Give Me the 1st Dance using a Sdp plate (I'm sorry, I didn't jot down the number but its one of the plates on the first series released...if anyone realllyyy wants to know, comment and I'll look it up.) Below is two coats of Belgrave Place.


I had in the back of my mind that I was going to layer and stamp my nails, so I initially did an accent nail using Cover Girl Disco Dazzle.


Cover Girl Disco Dazzle looked like a polish I had picked up at a random beauty supply place...here's the two of them together...but I don't know exactly how they compare as I didn't swatch them both. If anyone has used Midie, please let me know your thoughts as they have a lot of glitter polishes and I may have to go back and pick up a few more for layering!


I liked the layer of glitter so much, I decided to add Disco Dazzle to all my nails! I loved this look....will do again for sure! This is very blingy and holo sparkle goodness!


For anyone in the GTA, Sephora Yorkdale is now carrying the core line nails inc. polishes...good news if you are looking for them and don't want to travel downtown Toronto to Eaton's Center, which was the only location previously in our area carrying the core line of nails inc. polishes. I was also by Sephora at Square One last week (picking up the new Sephora by OPI holiday polishes!!) and seen the magnetic polishes there...it was the only ones they had but if you were looking for the nail inc. magnetics and don't want to travel downtown or to Yorkdale, maybe call your local Sephora and see if they are in stock!

While I was happy to try out the stamping, I really liked the result of nails inc. Belgrave Place with the coat of Disco Dazzle without stamping best and will hold myself back from stamping it next time!

Thanks for looking!