Showing posts with label Big SdP A. Show all posts

Monday, December 3, 2018

Gray Skies Call for Gray Nails!

We are having another overcast day here in the GTA.  But what else is new.  I heard on the news today that November 2018 had the most overcast days in a November ever. I'm not sure how accurate that is but it seems we haven't seen the sun very much.  Anyway, I thought the gray skies would be a good day to share these gray nails!  While I really liked how these turned out, there's nothing that wrecks a mani more than smeared stamping.  Grrrrr!  But it is what it is and by no means was the minimal smear obvious in real life, it just ticked me off!  Oh well.  Here's what I came up with!


Started with a base of two coats of Zoya Kristin, no topcoat.


Did a sponged gradient using Zoya Kristen, Sally Hansen Hard As Nails Retro Grape and OPI Black Onyx.


Topped with KBShimmer Clearly on Top.


Stamped using an image from Dashica Big SdP A using FunkyFingers Gesso.


Topped with KBShimmer Clearly on Top.  Now for those who check out my posts regularly, I use KBShimmer Clearly on Top most of the time and rarely have issue with it.  I know I had left time to allow the stamping polish to dry and when I thought about this, checked my supplies, etc. I determined that my bottle of KB topcoat was on the low side and I hadn't loaded it with top coat enough to float over the nails but rather spread what I had, causing brush drag.  I rarely have smear with KB tc and have used it for a long time with no issue.  I started a fresh bottle right after this and put this one away to top other others later and haven't had issue yet.  So user issue.  It happens.  But this just goes to show you when people say what is the best top coat that doesn't smear...is that it's not necessarily the top coat that causes the issue but user issue like I had here.  I should have known better but thought I was tilting the bottle to fill the brush well enough but it's apparent that I wasn't lol.  Some brands that people call their holy grail go to products have smeared for me.  There's a lot of factors that need to be considered and just trial and error what works for you!


Thanks for looking!

Sunday, February 9, 2014

Antique Looking Valentine's Day Mani


Another Valentine's Day mani; this one's isn't overly traditional nor overly funky.... antique looking to me...and I love how it turned out!


Started with a base of one coat of Chanel Taboo, no topcoat.  While one coat had pretty good coverage IRL, the pix don't do it justice and I should have done two for ....I'm just not a fan of the very sheer coverage at the tips and two would have been a better choice.


Layered with one coat of Shimmer Lorene**, no topcoat.


These pix have topcoat.


Stamped using CND gold chrome using Big SdP A.


Topped with SV to finish.  I think this mani looks pretty antique-y looking...which will be a good fit for the start of next weeks Digit-al Dozen theme; the posts will start on Monday.


While this pix isn't in focus, I like how all the sparklies show through it!


Still using Nail Pattern Boldness Glitter A-Peel and it's still working like a charm!


This picture is during the day in overcast skies; it high lights the glitter/stamping contrast best although not the best for my skin tone lol!


Hope you're having a great weekend....and thanks for looking!

**product sent for review; please refer to disclosure policy for more information.

Tuesday, April 3, 2012

Hippity Hop


This was my contribution to the Adventures in Stamping weekly challenge on April 1st which had the theme...no stamping. What a challenge! Do a mani and not stamp it? Maybe it was a joke?! Anyway, I wasn't nearly as creative as the other gals who did some awesome water marbling, freehand designs or decals, which proved fairly popular but I never thought of it to be honest...I just thought I'd do a little layering (with the thought I'd stamp it later and not just post it! ha!).

With Easter quickly approaching, I was eager to use a polish I received a couple weeks ago from Girly Bits called Hippity Hop to start some Easter mani's. Here's what I came up with.


Feel free to click to enlarge for a better view of the shimmer and glitter!
Started with a base of Ulta Cream of the Crop. This is three coats as it was pretty streaky and thin; three coats was needed to get good coverage and to even it out.


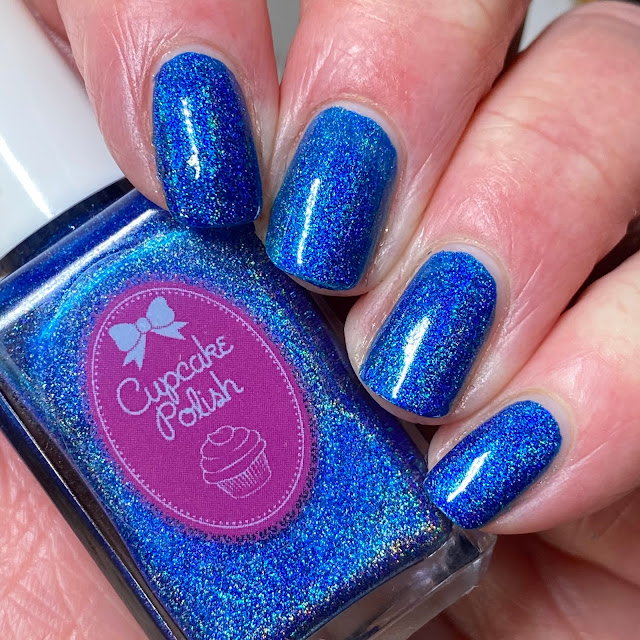
This is one coat of Girly Bits Hippity Hop over Ulta Cream of the Crop. 


While this was pretty, I was really looking for a more glitter goodness to add to this mani so added a second coat which can be seen below. Now we're talking!  For me, two coats was good...just enough to add lots of sparkle interest while clearly leaving the base polish visible.


Hippity Hop is just full of surprises!  Beautiful shimmer!  Blue, pink, purple, green AND holo glitter in  a variety of sizes.  Gorgeous!  I hope my pix do the polish justice!

Here's a bottle pix.


Hippity Hop is the creation of Pam, the founder of Girly Bits**, a fellow Canadian gal...you can check out her blog ...and order this polish... here.


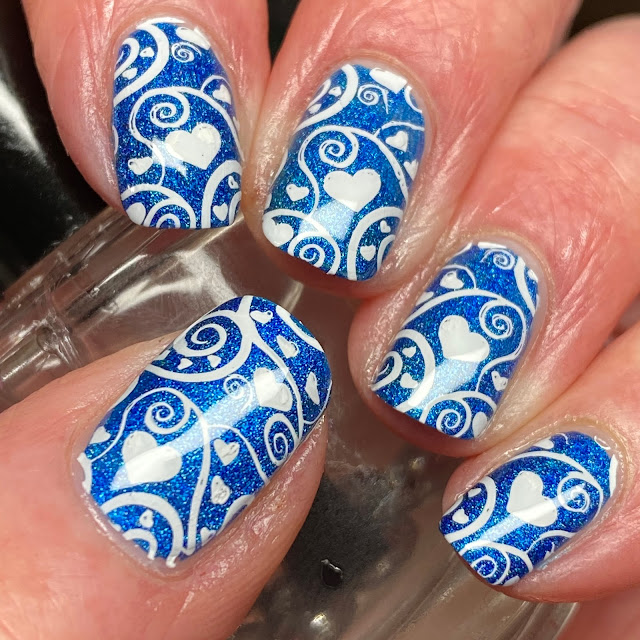
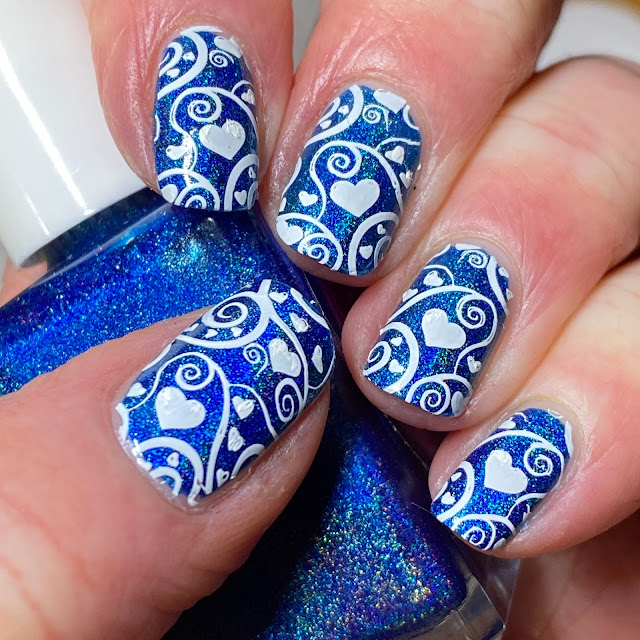
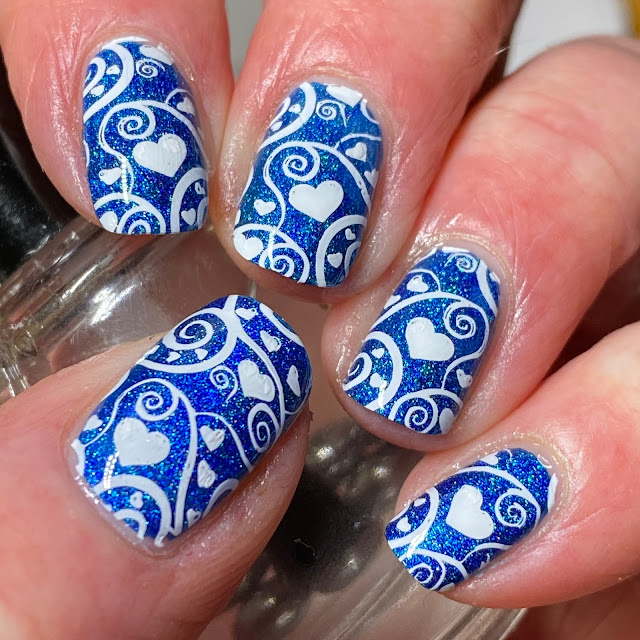
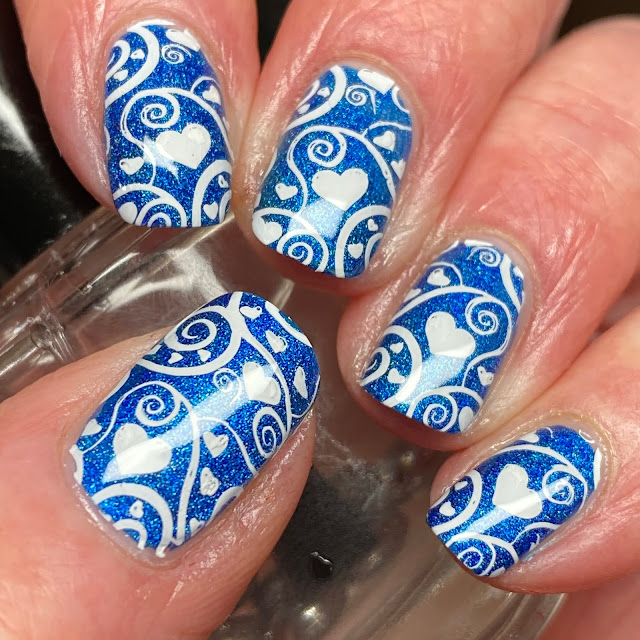
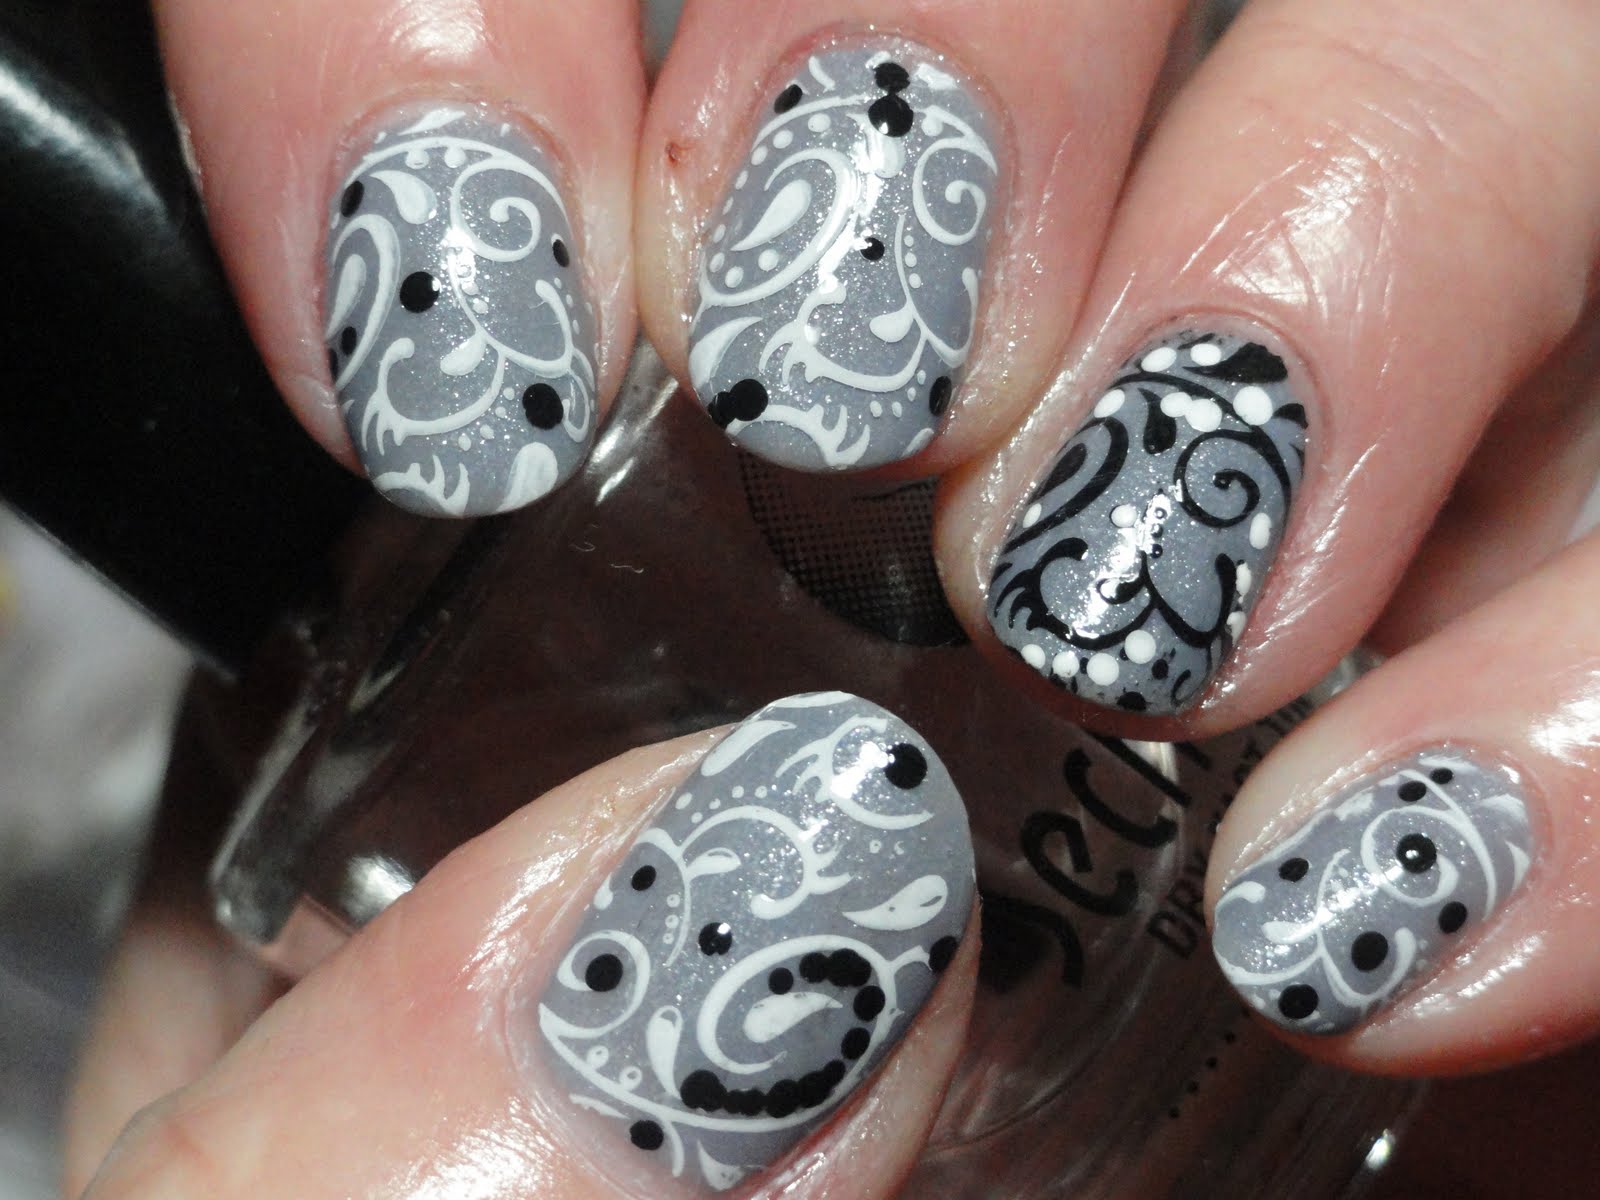
I always had it in my mind that I was going to stamp this mani and thought this would be a good kickstart to some Easter mani's...but wasn't thrilled with the results. I think it was poor choice in stamping polish which wasn't very dark.


Image plates used were Big SdP A (thumb) Big SdP F (index) Big SdP A (middle) XL A (ring) and XXL Big SdP-1 (pinky) using violet pearl Konad stamping polish which was didn't stamp opaque at all...wished I had have used Sally Hansen Royal Purple Chrome or something that didn't look so wishy washy.  Thank goodness stamping failures are easily fixed with some cotton and acetone...and just another excuse to do my nails again!

Thanks for looking!

**Please note that I paid the invoiced amount in full for this polish. I do not endorse nor promote this website/etailer other than I am passing on the info of where I got the polishes to those who may wish to know. I have no affiliation with this company and received no compensation for promotion of these products, nor am I promoting them...just letting fellow nail fanatics know where they may be obtained should they be interested!


Thursday, March 15, 2012

Pot of Gold At the end of the Rainbow

Green isn't one of my favourite colours...so I had to be a little creative coming up with a St. Patrick's Day mani without painting green on every nail. I thought of a pot of gold at the end of the rainbow would be a little colourful...here's what I came up with.


Base polishes used starting at thumb are OPI What's Dune? over two coats of OPI Bride's Bouquet, then Catherine Arley 803, Catherine Arley 674, Catherine Arley 673 and Catherine Arley 800, all two coats except 674 which was three. Finally cracked open my Catherine Arley's after all this time.


Stamped rainbows onto the nails using KleanColor black with plate Big SdP A.


My stamping failed me at the top of the middle finger plus a few other spots so I took a fine brush and hand painted in the lines. Not a fantastic job, but passable....from a distance!


Then I hand painted the cauldron for the pot of gold....this is why I don't do free hand art! lol! I stamped a shamrock too using XL F using A-England Saint George but it stamped fainter than I wanted so I did hand painted another coat of the polish over the design freehand.


Added a dab of Color Club Gingerbread Man for the gold.


Then decided a wanted some gold coins; used Nubar gold glitters and put them in the pot.


To prevent the faint holo from fading even more, I used a light coat of Sally Hansen Clear Hardener which is suppose to not kill the holo...not that it mattered in this case as the scattered holo is so faint to begin with. It was interesting to see that I had a little drag on the areas I hand painted....not sure why as the coat of SH was thin plus a good amount of time had passed since I had drawn in the lines.


Thanks for looking!

Thursday, January 19, 2012

Orly Pixie Dust

I really liked the shimmer of Orly Nite Owl; I went through my stash after I wore it to see if I had another colour with the same or similar shimmer finish.....I shouldn't have been surprised to discover it was another Orly....Pixie Dust.


I've had Pixie Dust for a couple years or more now. I can't believe it took me this long to wear it (althought it does seem to give me lobster hands judging by these pix; good thing that never makes or breaks a polish in my eyes!) This is two coats.


Stamped using Big SdP A using white and black Konad special polishes.


Added a few dots, SV and done!


This mani was easy peasy to do (too bad that nasty hangnail wrecks the pix, though :(


I got a lot of compliments on this when I was out and about....a comment I heard quite a bit was, is that 'those nail stickers'? I'm guessing no one was that familiar with stamping.....but, this may actually be a cool design for nail stickers, come to think of it!

Thanks for looking!

Wednesday, September 21, 2011

French Tipped Stamping Attempt....Again

My stamping nemesis is french tips. I can never get them 100%...or even 90% for that matter! One problem is that I feel that the french tip stamping looks nicer on square-ish shaped nails, which mine are not so they always look off. I never get them all on straight nor a uniform width. Nev-er. My nails are getting a length that I thought I'd soon should be filing them down a bit but before I do, I have enough length to again attempt a french tip without having it go halfway down my nails...one of the downfalls of having small nails. This is what I came up with.


Base coat is two coats of Quo by Orly Celestial Star. While there was good coverage with two coats, with the pix you can see some VNL which does not appear in real life.


I was iffy on the stamping right from the get go so did my thumb nail first using Big SdP H. I thought if I fail at it, then I can do something else on the rest of the nails. But I lined it up pretty good.


So proceeded on the rest of my nails. Did the pinky and middle finger. Doing OK. Onto the index finger. Of course. Index finger is too thick. *sigh*. Can never get them all matched. *sigh*. Decided on using Big SdP A as an accent on the last nail, as this image is the same design as the tip but in a full nail image.


At this point, I've gone too far to remove the design and its far too late at night to start another mani. So I thought I'd add some flower accents to be a distraction against the stamping. Used the flowers in SdP E. Silver stamping polish used is Nicole by OPI Positive Energy. The silver foil contrasted well with the blue foil. To finish it off, I added a couple swirls of holographic glitter.


The great thing about polishing and stamping is that you can try, try again.....practise makes perfect and just another excuse to change your mani!

Thanks for looking!

Monday, August 22, 2011

Zoya Midori; Layered and Stamped!

Zoya Midori, topped with Chanel Illusion D'or, stamped with Konad White special polish.


Here's mani in progress; two coats of Zoya Midori.


Topped with one coat of Chanel Illusion D'or. I remember when this came out and layering with it was all over the net. Don't see much of it now, I guess because so there's so many other cool layering options...and so much creativity in the blogesphere!


Then stamped using Konad special polish in white.


Added a few dots in Konad pastel yellow.


This pix shows the stamping a little better.


I really like that this stamp shows the layering combo and the polish doesn't get lost in the stamping as sometimes happens. Its always a challenge for me to come up with a stamp that lets the polish still shine through. Feel free to click to enlarge.


I also want to say a huge "thank you" to everyone for checking out my little blog and it hitting another follower milestone-600 over the weekend! Thanks so much!

Thanks for looking!

Tuesday, August 2, 2011

Casino Night!

A couple weekends ago, I was a dealer for Casino Night; here's the mani I wore to deal the cards. It was kinda interesting being a Blackjack dealer...considering I've never played Blackjack in my life! But it was fairly easy to pick up and we had a lot of fun!


Image plates used were fauxnad m40, D14 and Big SdP-A with Konad white and black special polishes and the Sally Hansen Insta-dri in red.

Here's mani before stamping: Used OPI Alpine Snow for white, Sally Hansen Insta-dri unnamed red and, because I had no black polish on hand as I was on holidays and only had a few polishes with me, I used a black striping pen (the kind you can write with like a pen but it also has a brush)! It was a good alternative as it was so well pigmented and it did the job nicely!


Sorry for the lack of posts the last couple of weeks! I've been on holidays. While I had every intention of posting my manis while I was away, unfortunately, when up in cottage country, sometimes the internet signal isn't the best and I wasn't able to stay connected long enough to upload pix. I'll have to do a couple catchup posts of my mani's while I way away along with a few pix from my holidays if you want to see what I was up to!

Thx for looking!