Showing posts with label Midie. Show all posts

Sunday, September 30, 2012

French Tip Challenge

Over at FB Adventures in Stamping, this Sunday's challenge was using a french tip design.  This is what I came up with. 


French tips are my nemesis...but I've been getting better on the lining up over time, but they are still far from perfect.  So for this challenge, I thought if I *had* to do a french tipped mani, I was going to try using a traditional, white french tip image.  Looking at my nails, while they have a little staining, they aren't terribly bad so I thought I could pull it off...maybe....but before stamping, I added a coat of China Glaze Love Letters for a hint of skin tone colour on my nails.  Personally, I can hardly tell the difference that it was added.


Then did french tipped stamping using m19 with Konad white stamping polish.  I didn't line it up that well and I had to double stamp to cover all the tips.  And about this point, I didn't think I was even going to do the mani so didn't even take a pix...then to top it off, I went to pick up a bottle of polish and really nicked the stamping on the middle finger.  So I had to come up with something to cover it so used unnamed Glamour glitter as a gradient and then Midie no. 8 on top.


Here's a pix at this stage...you can see my really bad job of lining up the tips and I think if you click on the middle finger, I'm sure you can see the wrinkle too. You can also see my multi stampings of the french tip to make it thick enough to cover my tips.  What a mess!  Anyhoo, I thought I better add some more stamping to cover up my french tip stamping fail, so used black Konad stamping polish and added a trio of flowers on the top of the tips using Konad m25.


Then topped with SV to finish. 


Here's a pix of my right hand...I didn't do too bad of a job on the tip and the trio of flowers.


Topped with SV.


I think my french tips still need some work, but I didn't mind how this turned out.  In fact, I could easily see myself doing something like this again, maybe changing up the flowers or using another design along with the stamping colour.  Maybe with enough practise, I'll eventually get it right!

Hope you're having a great weekend...thanks for looking! 


Wednesday, June 27, 2012

Sharing My ROAK


My fellow Canadian nail pal, nailXchange, spent a few months in various countries in Europe.  Her and I met up a few days before she left Canada last year for a swap that we had in progress (maybe even the night before? I can't remember now - it was half a year ago!).  Anyway, when we parted ways, she mentioned that she'd send me polishes that she thought I might like.  I told her no, she didn't have to, but she insisted.   

If you follow her blog, you'll know she has found some absolutely amazing polish finds in her travels.  (If you're not following, I'd suggest you check it out as she does beautiful stamping.)  I was thrilled that not once, but TWICE, she sent me packages while she was away.  The polishes have been sitting at my nail station, patiently waiting while I figured how out to use them  (it took so long cause I'm not really that great in visualizing how the layering of polishes will turn outand what goes well over that...I'm just not that creative as you can tell from the layering combinations I do, if that makes sense! Most of the time, I need to do test swatches just to make sure the end result is somewhat decent! lol). 

So not too long ago, I decided to use one of the new Mash plates for a mani; this is what I came up with.


Started with a base of two coats of Essie Raspberry.  This pix has no topcoat.


Layered gradient with Glamour glitter nail polish.  I'm sure it has a name but nothing I could really pick out specifically to be a name as I don't read Polish.  I called it Glamour Raspberry Glitter in my notes, lol!


Bottle pix of 'Glamour Raspberry Glitter'.


Closer to the tips for a futher gradient look, added Midie 08, which is a holographic glitter in various sizes in a clear base.  Topped with SV.


Stamped using white Konad special polish using Mash-46.


I wasn't terribly thrilled with the bare spot left on the middle finger where I didn't line the image up too well, so I isolated one of the flowers from the plate and stamped it at the base to cover.


Topped with SV.  As usual, its still not too creative in the polish layering but the two polishes accented Essie Raspberry well....at least, I thought so!


Here's bottle shots of the first package I received.


Bottle shots of the second.


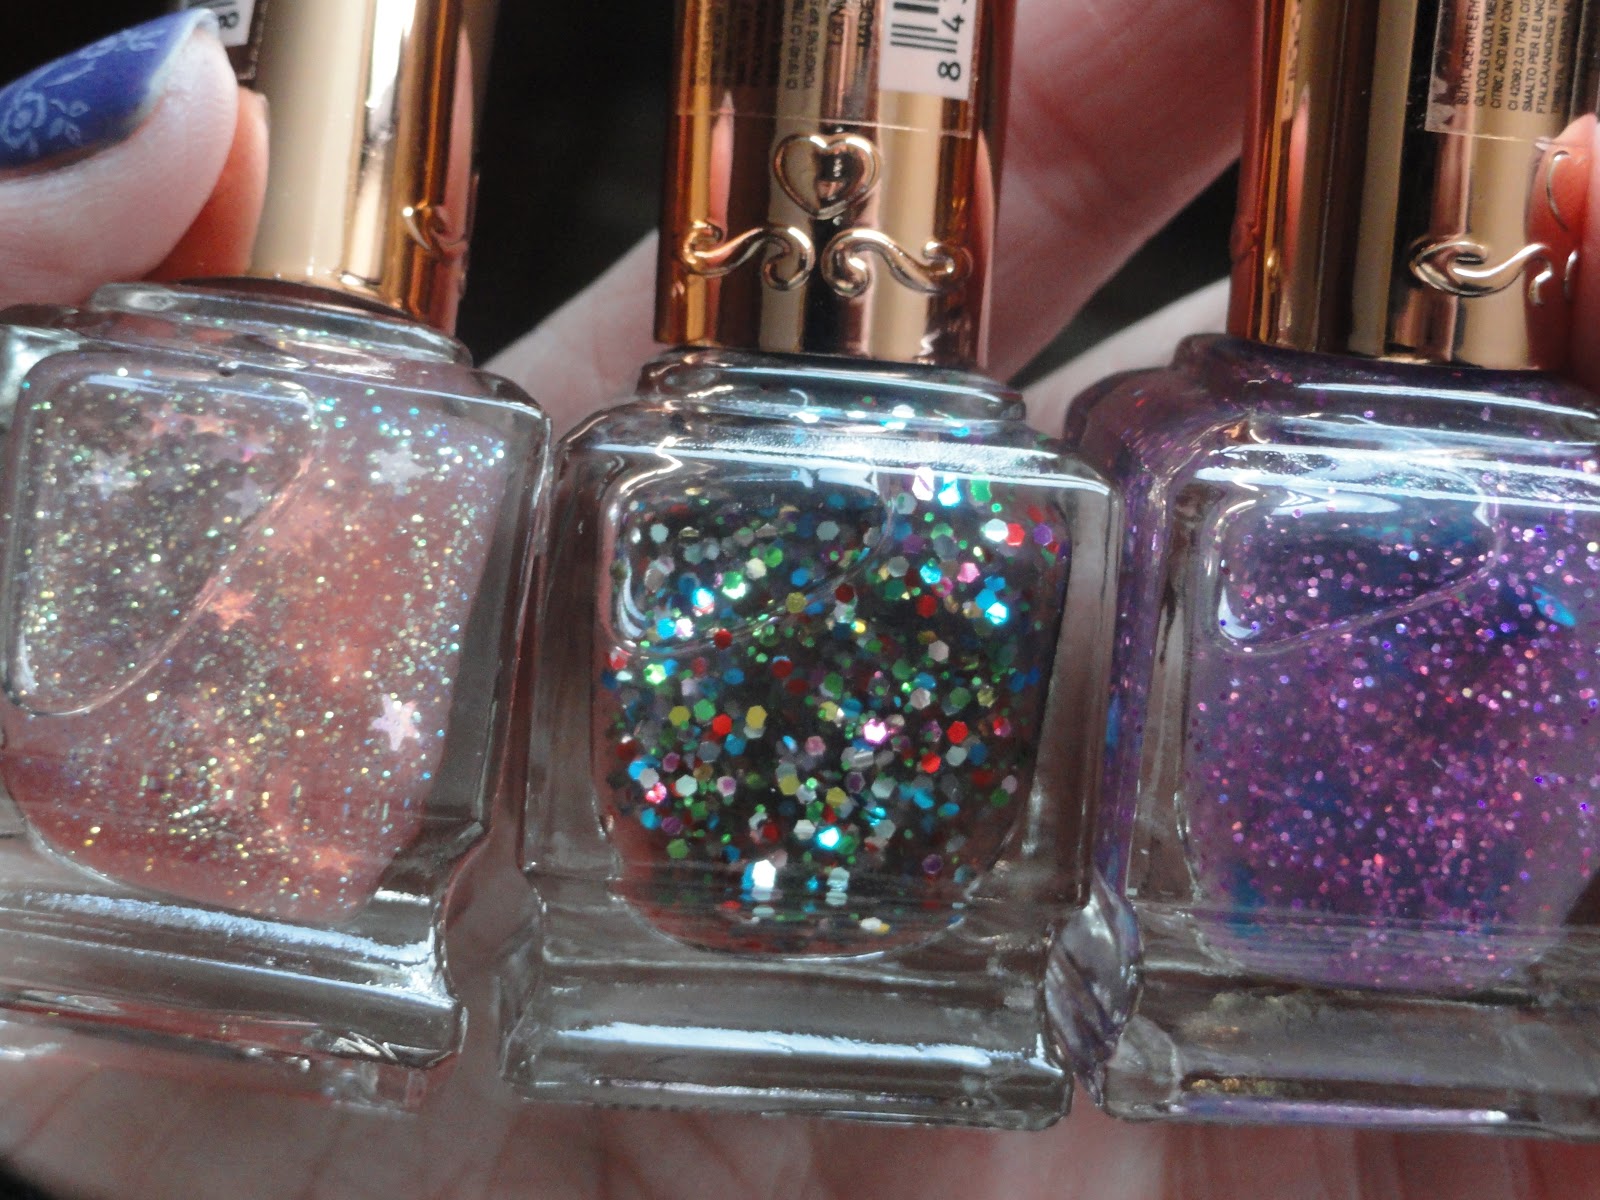
Close up of three of them.  The middle one, I'm dying to use but haven't quite figured out what base to use and haven't had time to do any sample swatching.  It and the far left bottle just seem so unique and unlike anything I have in my stash. 


Thanks again nailXchange for your amazing packages!  :)  You really shouldn't have, but I love them all and appreciate your thoughtfulness!  I hope to use the other polishes soon...if only I can come up with something creative enough to do them justice!

Thanks for looking!

PS:  I just remembered nailXchange is having a giveaway; if you are interested in checking it out, please go here!


Saturday, March 17, 2012

Happy St. Patrick's Day!!!

Top o' the mornin' to ya!

This is the last St. Patrick's Day mani I'm going to share until next year!


Started with a base of Zoya Veruschka.


Added Icing Evergreen to start a gradient.


Then Midie No. 4, which is a lighter green glitter with various sizes of glitter versus the fine, darker glitter of Evergreen.


Here's a bottle shot of Midie No. 4. I'm glad I stumbled across these at a little shop not too far from my house....pretty, but they are certainly on the smelly side.


Stamped using CND Gold Chrome using the various size of clovers on XL F and BM03 for the accent middle finger. (It seems I forgot to upload a pix of the mani at this point and I've already deleted the pix from my camera so no shot of the mani in progress here!)

With all this glitter action, I knew I had to matte this mani...so a coat of Essie Matte About You was added.


Then I remembered how chippy matte mani's are.....so added a topcoat of SV. This is how I wore my nails when I was out and about...but I much prefer the matte look.


Have a fantastic St. Patrick's Day! Thanks for looking!

Tuesday, February 28, 2012

Gradient Stamped Tips

It seems I've been doing a lot of full size nail designs lately, so a few nights ago, I thought I'd change it up with something that I hadn't done in a while...this is what I came up with.


Started with two coats of Zoya Mira.


Applied a thin coat of Cover Girl Amethyst Mist. When I'm doing these funky french gradient kind of manis, I have a tendency to apply the layering polishes too thick as in my mind, I think I need two coats or one heavier one for good colour coverage....unfortunately, the end result is that I have really thick tips as there's so many layers of polish on them! But in this case, I was taking the less is more approach. (Blue glitter, cool!)


Added Midie Color 6 on tips. I picked up a bunch of these glitter polishes as the colours and glitter look interesting! I've used two or three of them now and haven't been disappointed, especially for a polish that it on the less expensive side. (Caution...smelly!) Check out this bottle of gorgeousness.


Midie applied over Amethyst Mist.


Stamped using CH26 using Konad light gray special polish.


I decided to add rhinestones so broke out my iridescent ones as I thought the pink/purple/blue/white hues would compliment the other polishes well. Too bad that the prettiness doesn't translate well in the pix though!


Different lighting/different camera settings! While you see the glitter better in the pix below, the above pix is more true to colour.


My stamping nemesis is these type of french tipped designs as I can never line them up well...but I didn't do too bad of a job for once! Yeah me!


Thanks for looking!

Tuesday, November 1, 2011

Belgrave Place

This is another nails inc. polish I picked up from Sephora a while back.


nails inc. Belgrave Place, stamped with Nicole by OPI Give Me the 1st Dance using a Sdp plate (I'm sorry, I didn't jot down the number but its one of the plates on the first series released...if anyone realllyyy wants to know, comment and I'll look it up.) Below is two coats of Belgrave Place.


I had in the back of my mind that I was going to layer and stamp my nails, so I initially did an accent nail using Cover Girl Disco Dazzle.


Cover Girl Disco Dazzle looked like a polish I had picked up at a random beauty supply place...here's the two of them together...but I don't know exactly how they compare as I didn't swatch them both. If anyone has used Midie, please let me know your thoughts as they have a lot of glitter polishes and I may have to go back and pick up a few more for layering!


I liked the layer of glitter so much, I decided to add Disco Dazzle to all my nails! I loved this look....will do again for sure! This is very blingy and holo sparkle goodness!


For anyone in the GTA, Sephora Yorkdale is now carrying the core line nails inc. polishes...good news if you are looking for them and don't want to travel downtown Toronto to Eaton's Center, which was the only location previously in our area carrying the core line of nails inc. polishes. I was also by Sephora at Square One last week (picking up the new Sephora by OPI holiday polishes!!) and seen the magnetic polishes there...it was the only ones they had but if you were looking for the nail inc. magnetics and don't want to travel downtown or to Yorkdale, maybe call your local Sephora and see if they are in stock!

While I was happy to try out the stamping, I really liked the result of nails inc. Belgrave Place with the coat of Disco Dazzle without stamping best and will hold myself back from stamping it next time!

Thanks for looking!